Bubbles are one of the most common issues resin casters face, whether you’re new to casting or you’ve been pouring parts for years. While some bubbles are harmless, others can ruin detail, weaken parts, or create unwanted surface texture.
The good news? With a few simple techniques and a bit of prep work, you can significantly reduce (and often eliminate) bubbles in your urethane resin castings.
Before you get started, always review the Technical Data Sheet (TDS) for the specific resin or silicone you’re using. Each system may have unique mix ratios, working times, and temperature recommendations that directly affect bubble formation.
Below are practical, beginner‑friendly steps to help you achieve smoother, cleaner results with the RAMPF materials you use every day.
Understanding why bubbles form is the first step to preventing them. Common causes include:
Cold materials – thicker viscosity traps air.
Fast mixing – whipping air into the resin.
Humidity – urethanes are moisture-sensitive.
Complex molds – fine details or deep cavities can trap air pockets.
Pouring too quickly – causing turbulence and air entrapment.
Cold resin = thick resin. Thick resin traps tiny air bubbles.
Before mixing:
– Bring both Part A and Part B to room temperature (always confirm with TDS)
– If your shop is chilly, warm the shop or the sealed containers in a bucket of warm water for 10–15 minutes.
– Never overheat your components! Gentle warming is all you need.
Warming improves flow and allows bubbles to rise and escape more easily.
Before you touch the materials:
– Confirm the correct mix ratio (by weight or volume)
– Note the pot life and how it changes with temperature.
– Make sure you are within the recommended processing conditions.
Following TDS guidelines ensures the resin behaves as intended, including how well it degasses or self‑levels.
Fast stirring adds air. Slow stirring minimizes it.
For best results:
– Scrape the sides and bottom of your cup.
– Use a figure‑8 motion instead of whipping.
– Avoid whipping, churning, or lifting the stick quickly. This introduces air.
The goal is to combine the two components thoroughlywithout creating turbulence that pulls air into the material. A well‑mixed resin with fewer bubbles always cures better.
This trick is especially helpful for molds with fine textures or deep features.
What to do:
– Mix your resin.
– Use a disposable brush to paint a thin layer into the mold cavities.
– Allow it to gel slightly.
– Pour the rest of your batch slowly on top.
This helps push trapped air away from high‑detail areas and prevents pinholes.
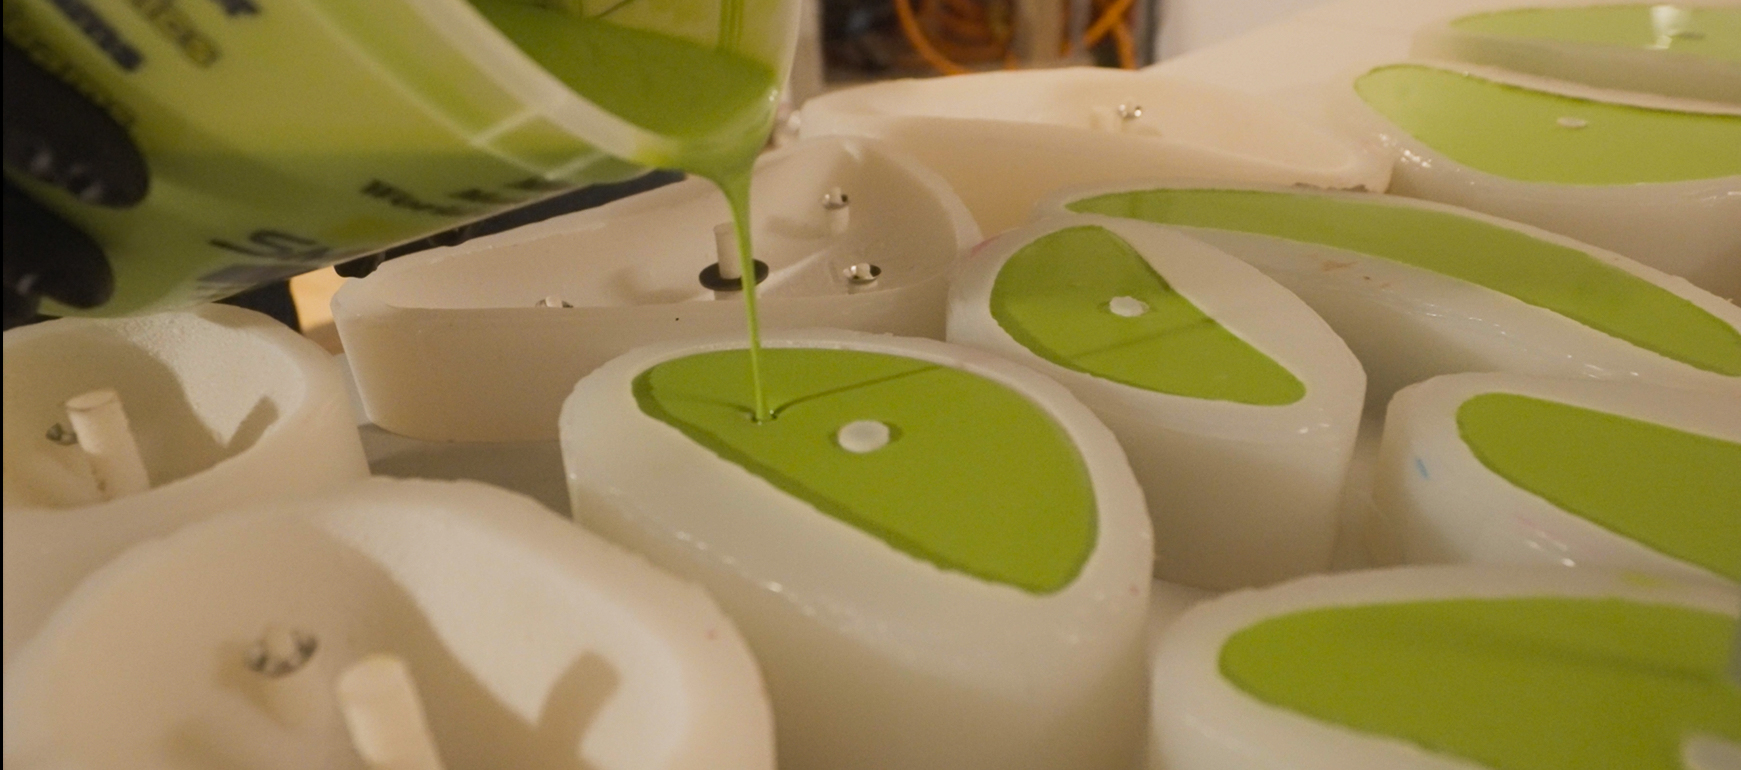
A narrow, steady pour helps break surface bubbles before they enter the mold.
Pour about 6–12 inches above the mold.
The ribbon-like stream gives bubbles time to pop naturally.
While many of our resins cast beautifully without equipment, pressure and vacuum can take results to the next level.
Pressure casting crushes bubbles into microscopic size. Great for:
– Small detailed parts
– Clear or translucent resins
– Resin systems with short pot life
Vacuum degassing removes trapped air before the pour. Ideal for:
– Highly viscous systems
-Moisture-sensitive resins
Use equipment when needed but proper mixing and warming do most of the work.
Before casting:
– Make sure your mold is fully dry.
– Avoid using too much mold release (overspray can create voids).
– Inspect for tears or thin walls that could trap air.
A healthy mold produces better castings with fewer issues.
Preventing bubbles in resin casting comes down to managing a few simple but important variables – temperature, mixing technique, mold condition, and how the resin is introduced into the mold. Taking the time to warm your materials, mix slowly, and prepare your mold properly can dramatically improve the quality and consistency of your finished parts. And above all, reviewing the TDS before you begin ensures you’re working within the recommended guidelines for your specific resin system.
With these steps, both new and experienced casters can achieve smooth quality results while getting the most out of our materials.
Have questions about a product? Want something custom made just for you?
Get in touch with one of our expert sales-representatives for more information about our products.
| Cookie | Duration | Description |
|---|---|---|
| cookielawinfo-checkbox-analytics | 11 months | This cookie is set by GDPR Cookie Consent plugin. The cookie is used to store the user consent for the cookies in the category "Analytics". |
| cookielawinfo-checkbox-functional | 11 months | The cookie is set by GDPR cookie consent to record the user consent for the cookies in the category "Functional". |
| cookielawinfo-checkbox-necessary | 11 months | This cookie is set by GDPR Cookie Consent plugin. The cookies is used to store the user consent for the cookies in the category "Necessary". |
| cookielawinfo-checkbox-others | 11 months | This cookie is set by GDPR Cookie Consent plugin. The cookie is used to store the user consent for the cookies in the category "Other. |
| cookielawinfo-checkbox-performance | 11 months | This cookie is set by GDPR Cookie Consent plugin. The cookie is used to store the user consent for the cookies in the category "Performance". |
| viewed_cookie_policy | 11 months | The cookie is set by the GDPR Cookie Consent plugin and is used to store whether or not user has consented to the use of cookies. It does not store any personal data. |